Is this some kind of evil torture device? Well… maybe! 🙂 An impeller can be your best friend … or your worst enemy. It requires attention and maintenance, usually only once a year unless you make it mad by not letting it pump enough water in which case it will disintegrate and lodge pieces of itself in far corners of your engine! Luckily the hardest part of maintaining your impeller is access since they’re always tucked away in the tightest, hardest to reach corners of your engine room. The rest is easy … well, sort of…
Before we bought Winterlude, I had no idea what an impeller was or that I even cared. I quickly found out that this little piece of black rubber can ruin my day by overheating the engine … or not. And it’s pretty much our choice. For the first couple of years we owned Winterlude, the diesel ran warm — not overheating, but warmer than optimum. And we really didn’t understand why – duh, otherwise we would have fixed it! A cruising friend diagnosed it as impeller disintegration while we were anchored in Puerto Escondido with the howler monkeys off the coast of Honduras. Rather than play in paradise, David & Doug spent a couple of days acting like contortionists fishing black rubber pieces out of our diesel.
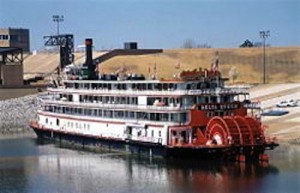
If you’re like I was and don’t understand the impeller concept, imagine a stern wheel paddleboat plying the Mississippi River in the grand days of yore. The boat has a gigantic wheel on the stern that’s more than just photogenic – it actually steers the boat through the water. While a paddle boat image is easy to conjure up, an old fashioned grist mill is probably more accurate in that it harnessed water power to provide energy. The impeller in a boat spins just like a paddlewheel which helps the salt water pump pull in raw (salt) water, cooling the engine.
If not enough water goes through, the black rubber fins can be damaged – worst case resulting in pieces of black rubber tearing off and moving on through the engine in places that they’re not meant to be — for example, clogging the hose from the impeller to the heat exchanger and even in the opening of the heat exchanger itself.
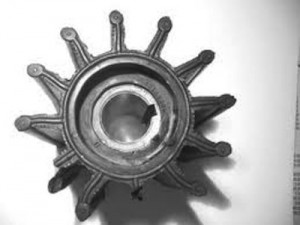
So if your diesel is running warmer than usual, the first thing to check is the impeller. Also, even if the impeller is fine, we like to change ours once a year just for fun (haha). Sitting in its little housing can cause the bottom side to go flat, which, of course, causes it not to pull as much water.
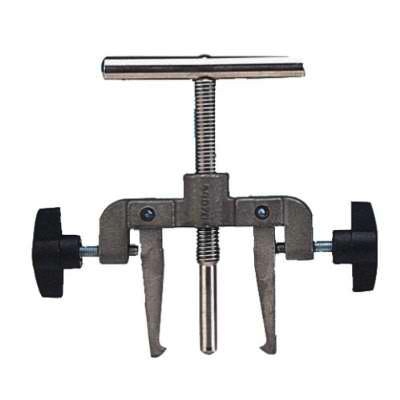
Also for years, David struggled and fought trying to remove the black rubber impeller without the proper tools, then we invested in the impeller puller and have decided it is definitely one of the most valuable tools aboard, even though it’s only used (hopefully) once a year.
Here’s how to replace the impeller:
1. Close the salt water seacock.
2. Locate the impeller and figure out the best contortionist configuration to allow your body to reach the screws to unscrew the metal plate. You may need the aid of your engine manual — you DO have an engine manual, right?
3. Remove the metal plate, revealing the black rubber impeller underneath. The plate surface needs to be clean and free of old impeller gasket, otherwise when you put the new impeller in, it may leak. It can be tricky getting the plate off — if it’s necessary to pry it off, do it VERY carefully with a thin metal blade so you don’t damage it. Clean the interior of the plate with a scrubby – make sure not to scratch or dent it or you’ll need to replace the plate too.
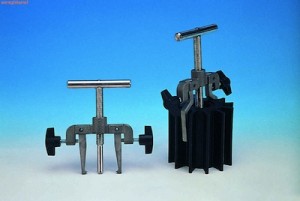
4. Using the handy dandy impeller puller, clamp the metal “fingers” around the impeller, tighten and turn the screw clockwise to pull out the impeller. Here’s what the manufacturer says about the magic impeller puller:
“Use this impeller removal tool for the easiest way to remove impellers, especially when the pump is mounted in tight and cramped conditions. Simply tighten the tool’s grip fingers into the rubber hub of the impeller and turn the extraction screw clockwise to pull the impeller out of the pump. A simple 3-stage operation easily removes the impeller and removes the risk of costly damage to the pump. Made from corrosion resistant cast aluminum and stainless steel.” Two different models fit all impeller sizes — make sure to get the one that fits your impeller!
5. Now that the impeller is out, you’ll need to insert the new one. Before you slide it in, there are a couple of important steps – first, lube the inside of the case and the outside surfaces of the impeller with silicone grease – avoid any petroleum based lubricant since they can eat the rubber. David uses a computer tie to bend the blades so the impeller slides in easily. No need to use the impeller puller to insert the new impeller.
6. Then comes the 2nd most tricky part — getting the paper gasket to fit in place while you replace the plate and the screws. The impeller will usually come with several paper gaskets – use the one that fits the shape of your cover plate. Then hold it in place while screwing the cover back in place — wish you had three hands yet? 🙂
7. Open the raw water seacock, start the diesel and watch the raw water flow out — it should be quite healthy and consistent after the first minute or so. Then go down and check to make sure there’s no water leaking out of the impeller enclosure.
Voila! New impeller! Now unless you do something to cause the flow of water to be interrupted — such as not keeping the strainer clean!!! — it should last at least another year. And if for any reason, you notice your engine is running warmer than normal, check the impeller immediately. We usually have at least two spares aboard along with their gaskets at all times. Some people say it doesn’t need to be changed annually, but why risk it for such an inexpensive maintenance item?
Do you do it differently? Maybe you know a secret to make it even easier? Please leave a comment and let us know! THANKS! Jan
