When we were looking to buy a boat, we wanted no teak for low maintenance. Unfortunately we fell in love with a classic boat and now teak is part of our lives. We both like it to look good, neglected teak is just depressing. Originally, 10 years ago, we opted for Cetol and Cetol Gloss because everyone assured us that it would be less maintenance than varnish. I’m not sure what less maintenance they were talking about, but in the tropics, we found Cetol (even with significant multiple coats and 2 more coats either every six months or annually) burned up quickly. We had the varnish stripped and redone while we were getting the boat ready to go in Florida in 2002, then again in the Rio Dulce in 2006. Now it’s 2011 and guess what we’re doing….
My initial experiment into varnish was documented on SailWinterlude.com under 2011 Refit on the sidebar. Below are some photos documenting a simple project that I took back north over the summer to complete while we were away from the boat, our cockpit table. The steps are basically the same, but our current varnish project is a much larger scale!
Please realize that we are in NO way varnish experts, we’re just classic boat owners trying to make our teak look good and save time to actually go cruising! We have learned a few things along the way … first that attention paid to the prep will pay off many times over in the finished product. I think this is where real varnish experts shine – they are relentless about getting the wood clean before they start. And it’s a thankless time consuming task. And actually laying on varnish is tricky too – it can’t be too thick or it “fisheyes” or “gators” — ugly wrinkly looking things that must be sanded out and erased before the next coat is applied. And it can’t be too thin or it takes too many coats to properly “build it up”. All the coaching from Rodney, our Varnish Artist, has been learned well, but I cannot emphasize that my varnish will NEVER look as good as his or any real pro’s. But it feels good every time I look at it to know that we created that beautiful glassy shine.
Varnishing the Cockpit Table
Step 1: Remove the table from the boat and take back to Illinois for the summer. It was just easier to do the entire project in my garage rather than on the dock in the glaring sun here in Florida. Plus I wasn’t wasting days we can be cruising on varnish. Makes sense to me! 🙂 On a normal teak varnish project, the very first step is to blue tape the entire boat, but since the table project was self contained, there was no need for blue tape. Be SURE to get the Scotch 3M blue painters tape – we’ve had the cheap stuff at either extreme – either not stick or stick so well we had to use a razor blade to help get it off in spots. You don’t want that hassle, use the “real” 3M blue tape.
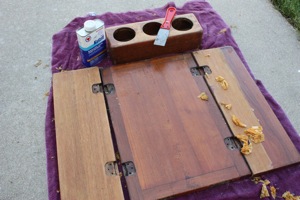
Step 2: Before we could start, we had to remove all the hardware so we had individual pieces of teak to strip and prepare. Normally we use a heat gun and varnish stripping tool for these projects, but since the tool was on the boat at we were at the lake, we opted to try a chemical stripper. It worked ok, not great, but I finally got the varnish off … with the exception of inside the drink box, which turned out to be hopeless, but I did the best I could.

Step 3: Because we’re notorious for losing pieces of hardware that came off projects, we placed all the hardware removed from the table in an old Folger’s coffee “can” and soaked it in white vinegar. I scrubbed the hardware with a wire brush and cleaned it so it was pretty bright again. An added benefit was we didn’t lose a single piece so when it came time to reassemble the table, voila!
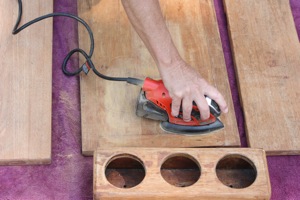
Step 4: Normally after stripping you’d go directly to the brightening step, but in the table’s case, I didn’t think the chemical stripper did as good a job as the heat gun and missing varnish stripper tool, so I sanded before (and after) using the brightener. Since we don’t do this all the time, we use a little Black & Decker Mouse Sander. It’s not the best sander, but it’s not nearly as expensive as what the pro’s use — usually Porter Cable Sheet Sander and maybe an orbital sander as well. It’s best to leave the orbital sanders to the pro’s – you don’t want to accidentally carve circular motion into your teak!

Step 5: Now stripped and sanded, it’s time to brighten the wood. When I first started repairing and patching my Cetol, I’d scrape/sand down the damaged area and just use bleach water and sunshine to kill the mold in the wood. Turns out, while that’s OK, it’s not a good way to kill mold deep down in the wood, which is what you’re trying to do – otherwise the nasty mold just grows back making black patches under your newly refinished teak … very frustrating, I might add. So on the recommendation of our friend Rodney, Burnt Store Marina/Punta Gorda, Florida’s resident Varnish Artist (yes that’s the name of his company if you’re trying to reach him), we brightened with a two part brightner called Snappy Teak. Snappy Teak is amazing, but don’t forget the rubber gloves – this stuff might eat your skin. First you wet down the wood (important to keep it wet the entire time and not let it dry out, so keep a hose handy). Then brush on the “killer” part. The wood will turn BLACK and really be a mess. It didn’t hurt our gelcoat, but it did make a mess on our bare teak rubrail below when we did the caprail and it also discolored our bronze window frames during our latest teak project, but I think I can bronze wool buff out the stripes in the windowframe. If not, Rodney says treating the entire window frame will make the result (which isn’t ugly) even instead of striped.
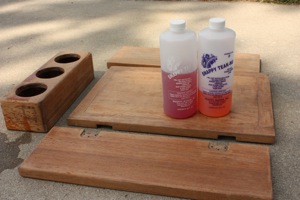
Step 6: Spray off Part 1 with a hose and use the brush that comes with the set to loosen up any varnish the Snappy Teak has lifted off the surface. Brush hard and then rinse with the hose again. Now apply Snappy Teak Part 2 … we used a red scotchpad type applicator. Part 2 neutralizes Part 1 and slowly your teak will turn from that gawd-awful scarey color running everywhere to whatever your real teak color is! Which I found out varies greatly – as an aside, apparently at some point someone before us replaced the front eyebrow on the cabin top – now that it’s stripped, brightened and sanded, the varnish is a much darker color than the rest of the eyebrow, go figure. Keep on hosing it off until you’ve given Part 2 a thorough rinse and let the wood dry. As it dries it will continue to lighten. When we first used it, I was almost afraid that the blonde wood on our caprail would NOT be pretty varnished, but it turned out perfect, maybe even a bit darker than I had hoped. So don’t worry about the wood being light.
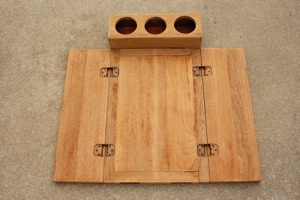
Step 7: Now comes the part I dread … wet sanding. We used 220 grit wet sand paper on this table. David is much better at wet sanding and he graciously agreed to do this job. It’s important to sand it hard, keeping it wet and getting to an absolute smooth surface. Be sure to wipe it down before it dries or you’ll have sawdust paste dried onto your surface that’s almost impossible to get off. So wipe it off with an extra wet rag as you’re wet sanding and don’t allow it to completely dry. Once you’re done, allow it to dry completely. Wipe it down one more time with tacky cloth you can get from any varnish department like Home Depot or even Walmart. This stuff is sticky and will get any loose dust off the surface prior to varnishing. Be sure to keep any extra locked in an airtight baggie because it will dry out and lose it’s stickiness.

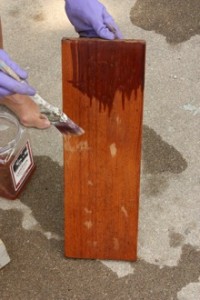
Step 8: NOW finally we get to making it pretty again. Varnish. Something else I didn’t realize is there are different kinds of varnish used for different applications. Based on our Varnish Artist’s recommendation, we used Min-Wax Great for Floors high gloss for our cockpit table, but because it contains no UV protectant, we haven’t used it on any of our other teak projects. The Min-Wax is extremely thin, so no thinning required for the first two “sealer” coats. These first two coats were applied one at a time six hours apart – no sanding needed IF there’s exactly six hours apart. After the first two coats, we began wet sanding with the 220 grit sandpaper between each coat. Wet sand, wipe down, wait until dry and tack cloth to get any stray dust off, then apply another coat. One tip on applying varnish – not too thick, not too thin and brush only one way, with the grain. Continue to build up coats, beyond what’s recommended on the can – I think the table has 8 coats (sealer coats don’t count, so if you counted the two sealer coats, it’s 10 coats).
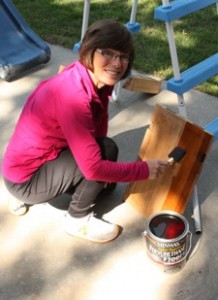
Step 9: Let it dry thoroughly before reassembling with the cleaned hardware (that we didn’t lose!).
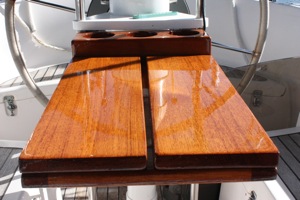
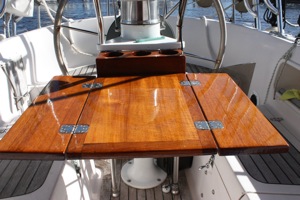
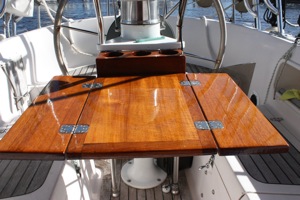
Re-install the table and enjoy the beauty of the new shiny varnish! Here you can see our cockpit table – originally the table was just the size of the bottom, far too small for more than a cocktail for two. We enjoy eating almost every meal in the cockpit, it’s our family room. So we had someone add the two leaves so we could fold it out and have a large enough space for the two of us to eat.
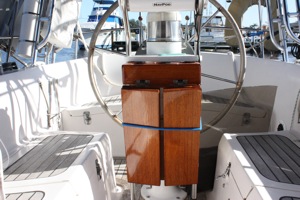



Looks great