Anchors are expensive and maintaining them is a challenge for all cruisers, regardless of cruising ground. If you put your anchor in the water…. and sometimes if you don’t, sooner or later it’s going to end up rusty.
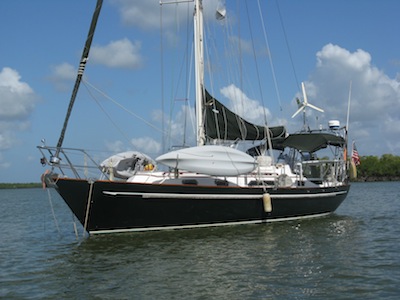
Arriving back at the dock in Florida for a mini-refit after six years cruising the Western Caribbean, we were dismayed to see our well-seasoned anchor looking sadly neglected. Unfortunately, a rusting anchor and chain is much more than a cosmetic issue. Rust weakens anchors and chains, compromising safety.
Ironically, we turned down an opportunity to get the anchor and chain re-galvanized with a group of other cruisers in the Rio Dulce, Guatemala. At the time, it was only a few years old and didn’t need re-galvanized. How were we to know how difficult it would be when we returned to Florida three years later?

Naively we checked with the marina dockmaster and other cruisers in the marina to find a competent place to re-galvanize. Everyone looked at us like we’d lost our minds and recommended buying a new anchor and chain, which was NOT in our re-fit budget! After numerous telephone calls and research, we concluded there was no way to get the anchor re-galvanized and we skipped over it on the refit list, moving on to other projects.
Meanwhile our trusty anchor and chain continued to rust. We finally located a potential location for re-galvanizing, several hours away, but they had a huge minimum order and Winterlude’s anchor was only 44 pounds. Plus, we discovered during the re-galvanizing process, the lead in our Spade anchor would melt and need replaced. This option was sounding less and less ideal and more and more complicated.

Posting questions on internet forums yielded many responses, but no solutions – until my phone rang out of the blue. Since everyone, including “Peggy”, knows that customer service is dead in America, imagine our surprise to be talking to our Spade anchor’s USA distributor, Sea Tech & Fun USA. They were calling to let us know the company had been diligently working to perfect an epoxy refinishing kit that would retard future corrosion PLUS we could do it ourselves! To get a Downloadable PDF Spade Anchor Epoxy Refinishing Brochure, click here!
The rusty chain was no longer an issue because we took advantage of a sale price at the St Pete Boat Show and replaced our 5/16 high test chain.

Here’s how easy the anchor project was … of course, the jury is still out on how long it will last, but since we are almost ready to cast off the docklines again, we jumped at the opportunity to try it!
- All the corrosion and grease must be removed from the anchor. Ideally the first coat of epoxy will be applied immediately or at least within a few hours as the anchor is cleaned. For best results, the anchor should be sandblasted – especially if it’s like ours and really rusty. If it’s not so rusty, it is possible to use a wire brush to remove the corrosion. The sandblaster gave us another tip – after sandblasting don’t touch the anchor with your bare hands – skin oils will speed the corrosion process all over again.
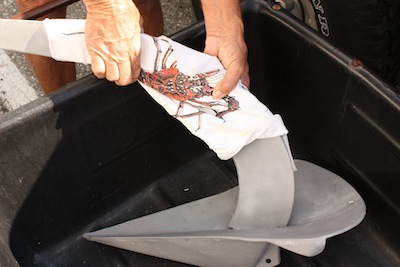
Important Not to Let Hand Oils Corrode the Newly Sandblasted Surface … and Get A First Coat On Within Hours
- Returning to the dock, we mixed one third of the two part epoxy according to the instructions in the kit and applied the first coat. The mixture is a thick silvery color similar to the original color of the anchor. It went on easily with a paint brush and cleaned up with acetone. Keep in mind, don’t mix more than you’ll use for one coat because two part epoxy will cure and be hard as a rock when you attempt the 2ndcoat the next day. Also keep in mind, the lower the humidity, the faster it will cure.

First Coat of Epoxy – Important! Only Mix as Much as You Need Because Epoxy Will Harden Before Next Coat!
- After letting it dry for 24 hours, we mixed the second batch of two part epoxy and brushed it on for the second coat.
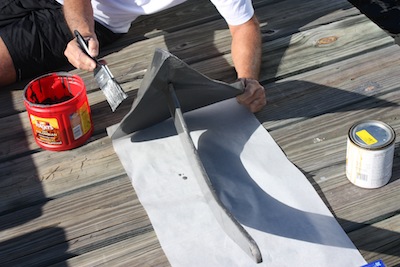
- Day Three … the forecast was for rain late in the afternoon so we mixed the last third of the two part epoxy and applied the 3rd coat early. After six hours the epoxy is not sticky to the touch and the rain held off so all was well.
The Sea Tech & Fun USA folks advised us in advance that if we didn’t care for the brush strokes in the epoxy, it was perfectly acceptable to lightly sand the finish and thin the final coat of epoxy just a bit with acetone before applying it. We opted not to try and minimize the brush strokes – aboard Winterlude we’re all about practical and getting the anchor back in the water. The brush strokes didn’t bother us but others might feel differently.
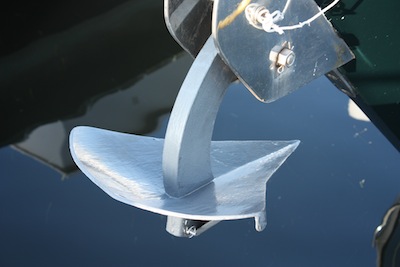
After the third application, the anchor needs to set and cure for at least three days before using it again. We’re looking forward swinging on the hook once again!
For more information on the Anchor Refinishing Kit, contact Sea Tech & Fun USA at 321-409-5714 or e-mail at www.spadeanchorusa.com. Ask for Evan & tell him Commuter Cruiser sent you!
NOTE: We are not affiliated with this company or product in any way other than happy customers.


This is great and timely information. We were just cleaning the anchors and chain with Vinegar: cleaning off rust and salt corrosion. Painting to prevent further deterioration would be the next step.
We are cruising the Med in a Lagoon 380, light but with quite high wind age. Mostly gentle winds but gusts up to 35/40 knots from time to time. The combination of a 100 meters of 10 m/m and 27kg Manson Supreme allows for untroubled sleep and tremendous safety. Sincere advice is to find the cash and get a Manson, bigger than recommended will allow justified smugness, we see many yachts with puny inefectual CQR anchors and wonder WHY ?
Your link should be spadeanchorusa.com (you had a typo)
I have a Spade 140S on a Hallberg Rassy 48. Fantastic anchor, it has been as close to perfect as you can imagine. Over the past 8 years it has not always set the first time but once it was in, it never budged even as a sole anchor in winds up to 60kts. The problem is that at least the first ones were poorly galvanized and after more than two years in the water int looked bad. My boat is currently in Marmaris in Turkey and I have found a place where they removed the lead, hot dip galvanized it and then put the exact quantity of lead back in the tip for €140 altogether. This epoxy paint looks good but a hot dip galvanizing job is bound to last longer and if you look around, you can find places that are capable of doing it for just a bit more money than the epoxy paint. In my opinion tho is a no brainer. Happy to post pictures of the end result if people tell me how its done.
Hi,
I also have a Spade anchor, which I’m very satisfied with. I found your page while looking at what to do with my Spade which has taken 4 years of full-time cruising, and the epoxy solution looks interesting. With hindsight, since it seems that you wrote this 2 years ago, how are you satisfied with the epoxy ? Did it hold out well ?
And do you know if it was any kind of special epoxy paint ? We’re located far off in the Pacific, and finding this kit here will be a challenge, so wondering what I could use that I can find locally…
Thanks a lot for all the information provided !
Nicolas
The sandblasting/special epoxy kit was satisfactory for the price. Spade USA made it sound like something that had been specially formulated for them, but who knows. Two years later, the anchor is developing rust again, but just spots, mainly around the edges. It’s still holding up pretty well. I think I’d try the hot-dipping referenced in a comment earlier if I could find a place that would do a small project. The only place we could find at the time in Florida wanted a minimum of several hundred pounds – either that or go to North Carolina to find a place. If you’re in a more remote part of the Pacific, I’d think finding a spot would be easier. Check the comments thread above. Enjoy the Pacific! Cheers! Jan
Jan,
Would you be able to have the anchor regalvinized after it’s been painted with the epoxy?
How long did you epoxy hold up? What did you do next with that anchor?
Thank you!