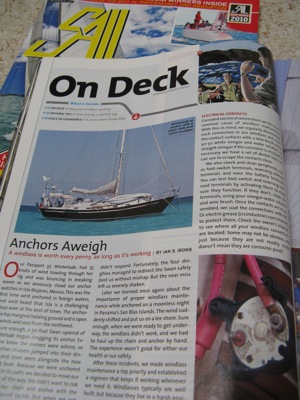
SAIL Magazine published my Windlass Tips article in the November 2010 issue. I’m including the original article submission with additional information from the actual article.
********
As 35 knots of wind howled through our rigging, the boat bounced with the breaking waves as we tensely kept anchor watch during our first norther in Isla Mujeres. Isla Mujeres Mexico is a challenging anchorage, with marginal holding, open to the winds and seas from the northwest. Add Murphy’s Law and you have the makings for a windlass disaster! When the 50-foot Swan broke loose (with owners ashore) directly upwind of our 37’ Passport, four cruisers hopped in their dinghies to intervene. Meanwhile, anchored directly in its path we opted to move to avoid the risk of tangling our anchor with the Swan’s dragging chain and anchor. But alas, our windlass absolutely refused to function, let alone raise the 120’ of 5/16” chain and 45# spade anchor.

Windlasses typically don’t require a great deal of maintenance, but being continually exposed to a harsh environment makes the small amount of maintenance required disproportionately important to your safety and the safety of your floating home.
This was emphasized to us one dark night anchored in the San Blas Islands of Panama when the wind switched abruptly in the middle of the night putting us on a lee shore. When the windlass didn’t work, we were forced to quickly haul up the anchor and chain by hand – not something recommended for our health!
Keep your windlass working by using the following tips:
Check Electrical Connections First!
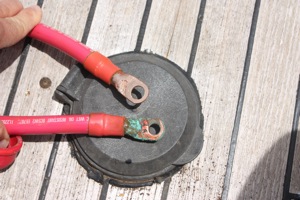
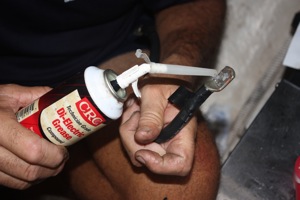
Invariably, if our windlass doesn’t work, corrosion has infiltrated some hidden electrical connection. Because of the harsh environment, even when covered, windlass electrical connections are the weak link in the chain. Disassemble and clean connections with a wire brush. A vinegar and water solution – or vinegar alone for stubborn corrosion – can make cleaning easier. Dental tools can reach into hard to clean spots. Once re-assembled, cover the connection with a generous coating of di-electric grease to help protect it. Keep in mind, even if you can’t see it, corrosion may still be the culprit, so disassemble and clean all connections first. Make sure you know where all the potential connections are located – some may not be obvious – check the motor terminals, fuses, footswitch terminals, reversing solenoid terminals as well as the battery and isolator terminals.
Electric Motor: Vulnerable to Insufficient Voltage
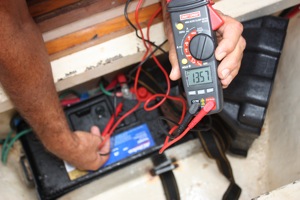
Neglecting the windlass’ electric motor is a common cause of windlass failure. Insufficient voltage can cause motors to burn out, so be sure to regularly test the voltage reaching the motor. If you have a separate windlass battery, insure your charging system is keeping it topped off. Ironically, a common cause of insufficient voltage to the windlass electric motor is corrosion on the connections, so keep those connections clean!
Salt, Mud and Sand Are The Enemy!
Because the windlass lives in such a harsh environment, keeping it cleaner is invaluable. Rinse the salt, mud and sand off the chain and windlass with fresh water – every time the anchor comes up if possible. If you don’t have a fresh water washdown hose, use salt water to clean debris – especially mud and sand – off the chain before it enters the chain locker. If, like us, you have no washdown system and are forced to use a bucket, it is still a critical step to keeping your windlass working! Aboard, sv Blue Jay, Jay Jarvis from Fremantle Australia, attached a 2” radiator hose below decks where the chain runs close to the windlass as another step to keep mud, sand and debris from splattering onto the electrical connections and motor.
Best Preventative Maintenance: Do Not Abuse Your Windlass!
- Be careful not to overload your windlass when setting or breaking out your anchor. Windlasses are not constructed for everyday overloading! Aboard Winterlude, we use an all-chain rode so we put a nylon snubber on the chain before backing down to set the anchor. This changes the load to the stretchy nylon rather than the inflexible chain, thus lessening the impact on the windlass. When we bring the anchor up, we drive the boat forward to help break the anchor out, not imposing the full load on the windlass.
- Keep it covered on deck when not in use. Windlasses are exposed to the salt air and elements continually. Covering the exterior with a good canvas cover reduces the amount of UV, salt and corrosion exposure.
- Wash down the windlass exterior with fresh water when possible to avoid salt buildup.
- Initiate a regular maintenance schedule. Different windlasses require differing maintenance schedules – BE SURE TO CHECK WITH YOUR MANUFACTURER BEFORE INITIATING YOUR MAINTENANCE SCHEDULE!
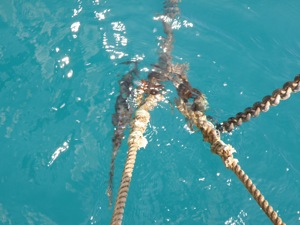
When Anchoring With Chain, Always Use a Nylon Snubber to Reduce Shock Loads
Example of Bi-Monthly (every 2 months) Maintenance Schedule
A. Check all electrical connections for corrosion. If there is any evidence of green, take apart, clean each connection and protect with di-electric grease. Actually it is not a bad idea to clean all electrical connections regularly even if your windlass is still functioning.
B. Top off grease as necessary.
C. Run your windlass up and down to redistribute the grease in the casing – if a windlass is not used, the grease tends to settle in the bottom, resulting in a dry section of gears. By regularly turning the windlass, you make sure the grease continues to grease the entire gear.
D. If your manufacturer recommends, disassemble and clean the clutch plate. Make sure not to over tighten when you reassemble! We like to let our clutch plate free wheel down just to insure it will!
E. Check to make sure the electrical motor is getting adequate voltage.
F. Clean exterior parts with fresh water.
Annual Maintenance Schedule Example
A. Our windlass is a sealed unit, therefore there is no additional grease required in the gearbox. If your windlass is not sealed, follow manufacturer instructions to clean and refill with grease annually.
B. Disassemble and clean the clutch plates. Check by letting chain free wheel down.
C. Straighten the chain lock if wear has caused it to bend slightly.
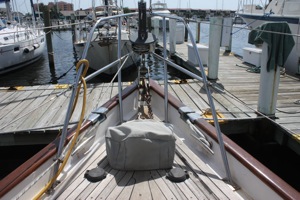
D. Every six months we take everything out of our anchor locker and thoroughly clean the anchor locker, the chain locker and around the interior side of the windlass. At the same time, we can check each link in our chain and ground tackle as well as switch end for end if required.
Use Your Windlass! Weekly Test!
Even if anchored for days or weeks at a time or in a marina, running your windlass once a week or more will insure it is still functional. Testing regularly will let you know if you need to clean the terminals before sailing off to your next anchorage in paradise!
If you have other tips to help keep the windlass running reliably every time you need it, please share them in the comments section!



Thanks for the article, can there be in any manner I could recieve an email whenever you create a fresh article?
To get e-mail updates whenever a new post is available, just scroll down the right hand side of the CommuterCruiser home page until you see “Subscribe by E-Mail”. Thanks!