Making a list, checking it twice may be the theme for the season, but it’s also a good theme for preparing for an overnight passage. Especially on an almost 30 year old boat with an almost 30 year old diesel engine!
Basically, we simply think through everything that we could possibly need to use during our sail and double check it to make sure it’s functional and doesn’t need some extra attention. Here are some thoughts for starters, your list will be different depending on your boat ….

Above Decks: Check all lines and halyards for any chafe. Remember ALL lines …. like us, the one you miss may be the one that fails underway… see our recent post “What Broke? Lessons from an Overnight”
Check the rigging, tighten every bolt, nut and screw, Check the windlass, make sure it works – both up and down. Inspect the anchor and chain and all connections. Make sure the anchor is secured and tied on so there’s no chance of it escaping in rough seas.
Make sure you have something aboard that will undo any fastener on the boat – allen wrenches? The proper wrench or screwdriver … it never fails, the one you don’t have (or didn’t know you needed) will be the one that will need undoing underway.
Wash off the boat, making sure the hatches and portholes are water tight. If not, redo the seals – or use vaseline to extend their lives. While you’ve got the hose out, top off the water tanks.
Turn on all the exterior lights, navigation lights, anchor light and deck lights to make sure they’re working.
Open the propane locker – soapsuds all the connections to make sure nothing’s leaking. Check the propane bottle – do you need propane? We refilled ours and had to get a 5 year inspection – tanks are only good for 5 years before they need inspected. Not a big deal, but necessary to get propane refilled.

Turn on all the electronics and make sure they’re working. Does the wind indicator work? How about the depth sounder, VHF, SSB, radar and AIS? Double check the GPS and/or chartplotter. Put in a route and double check it before leaving the dock (at the last minute in the middle of the night with no sleep, we noticed our buddy boat seemed to be heading to an entirely different spot than we were heading – in a panic, we checked to make sure we had the right waypoint (on both David’s Garmin GPSMap at the helm and my IPad SeaIQ below). We were fine, they were just off course, but we weren’t sure in our sleep deprived muddled state.
Run the jacklines so they’re ready to go. We have a rule, no one goes out of the cockpit without the other on deck EVER. At night we both wear our inflatable life jackets/harnesses clipped to the jacklines even while we’re in the cockpit.
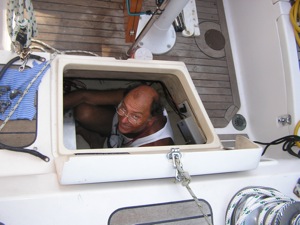
Engine Compartment: Start the engine, let it run for a bit. Is there water coming out the exhaust? Is it running at an ideal temperature? Look below – is the alternator belt turning, in good shape & putting in amps? Is the salt water pump leaking? Check the packing gland/stuffing box to make sure it’s not dripping too much or too little. Check for any other abnormalities as the engine is running. Pull the stop switch and turn it off. All OK?
Now look at other stuff in the engine compartment – for us that means topping the batteries off with water – yes we KNOW the engine compartment isn’t the ideal location for batteries, but there’s no other space, that’s how it came. Turn on the wind generator & make sure it’s putting in amps.
After the engine cools a bit, check the oil levels and the transmission fluid. Top off if necessary (since we just changed the oil, filters and impeller it shouldn’t be a problem).
Inside Cabin: Test the EPIRB. Make sure the stove and propane systems/solenoid are working properly. Check the inverter and any other stuff below that didn’t already get checked with the electronics. Do you have or need 12v chargers for any electronics – a cell phone, IPad, tablet or laptop?
Make sure everything below has a secure spot for underway, especially when it gets to be a tilt-a-whirl ride. This isn’t as easy as it sounds. Our TV gets strapped down, all the computers and cameras are put away or in secure spots, front restraints are put back in bookshelves, anything sitting out is put away. If you use your oven to store baking pans, as I do, make sure the oven door won’t come flying open and bombard you with pans.
See the spice rack – the top spot next to the companionway is reserved for meclizine – our seasick meds. Sometimes important to have it next to the companionway, accessible from the cockpit without ever going below!
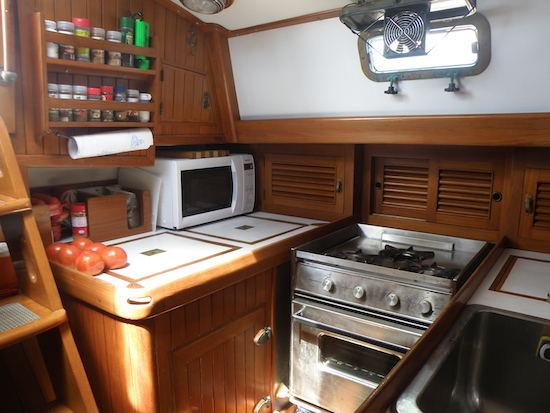
Make sure the galley is ready for underway meal preparation. I put the pot restraints in place and double check to make sure the stove gimbal lets loose. (Don’t forget to prepare meals in advance, that way when it gets topsy turvy, we still eat hot meals – here’s a favorite: Favorite Overnight Passage Meal: Rice n Beans. The Boat Galley Cookbook has an entire chapter devoted to Passage Meals, including snack ideas and other important considerations.
Get out anything you may need underway – snacks, warm clothing, whatever so you’re not searching for stuff below while the boat is bobbing and weaving. Don’t forget life jackets and harnesses. And rain gear – we had a couple unexpected sudden torrential downpours out of nowhere. Lucky the raincoats were hanging next to the companionway.
I’m assuming everything in the head will be working fine, but don’t forget to double check, especially if you don’t use it while in a marina.
Here’s a handy checklist for leaving the dock and a Commuter Cruiser article on Leaving the Dock. Both have more information and probably some things I’ve forgotten.
Don’t forget to make your own list, then check it twice! Anyone have other things that I’ve forgotten? Please leave a comment and share and I’ll add them to the list. Cheers! Jan


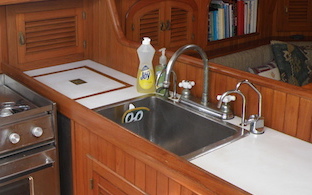
Hey Jan, since you included a photo of the galley… When you have a minute, would you mind taking a tape measure, and tell me the width of the galley (fore & aft) and the height of the counters above the sole? Since I’m rebuilding the galley on Renaissance, I’m collecting data on other boats… Thanks!
Hi Keith — Winterlude is 37′ overall with a 11’9″ beam and 29′ on the waterline for reference. Our galley: 63″ from the locker doors to the end of the cabinet on the sink side (19″ wide). From the back wall to the outside of the sink (width fore & aft) is 75″. The aft countertop (with the refrigerator and cooler top openings) is 44″ before it runs into the companionway. Counter height to the counter (not including the teak fiddles) is 35 1/2″ on the sink side and slightly less on the back side to account for the sole sloping. Let me know if you need other dimensions to help give you ideas for Renaissance…. or if I’m not clear. BTW, I love my galley — underway there are lots of ways to wedge myself in and cook. Cheers! Jan
Excellent, Jan – one more dimension – the space between the aft counter and the sink counter? Basically I’d guess that’s the width of your stove, perhaps plus a little?
Based on what you’ve given me, it looks like my planned dimensions are spot on, considering that Renaissance is only 35′ x 9.7′, and 25′ at the waterline. Of course her waterline will be longer once we get her loaded for cruising! 😉