Finally I get to make it pretty instead of the unending prep! No matter how much I detest the prep, it is the KEY to the final glassy reflective finished varnish I’m striving for, so again, don’t cut corners on the prep! Now we’re down to the final “prep” step before I can actually dip my paintbrush into the varnish! I take a “tack cloth” and go over every bit of the fine-sanded wood.
Even though we wiped it down thoroughly the day before, the tack cloth is the final step to get any remaining particles of dust or dirt. The tack cloth is … well, as you might expect … tacky. To keep it tacky, it needs to be stored in a plastic baggie. You will have tacky fingers and hands after this process (at least I always do) so you may want to wear rubber gloves to keep the tacky on the wood and not all over your hands!

FINALLY, now comes the fun!
If you’re working with bare wood, the first two coats of varnish need to be “sealer coats”. This came as a BIG shock. I always assumed the ten coats means TEN coats … that would be the first two sealer coats plus eight regular coats. NO! WRONG! The two sealer coats DO NOT COUNT! So gauge your “schedule” accordingly. In our case, we planned one coat a day, every 24 hours. So it took us 2 days for sealer coats, then another 8 days for the real thing for just the initial 8 coats, and we should have done 10….
Depending on the type of varnish you’re using, you may want to dilute these coats to thin the varnish to make sure it gets into every crack and crevice, effectively sealing it so that moisture and salt air and mildew cannot get in. With Pettit Flagship Varnish, we thinned the first two coats with Interlux Brushing Thinner 333 following the instructions on the back of the can. The important thing is that you HAVE sealer coats!
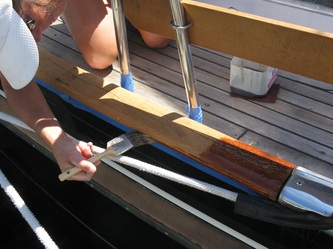
Another important consideration is a good brush. You do not want to use a cheap brush or you’ll have bristles falling out and sticking in your varnish every few feet — not a good look — and with all the prep time you’ve invested, don’t cut corners. A badger hair brush is the best — we bought ours from our Varnish Artist friend, so we got the advantage of his quantity discount. I used two badger hair brushes during the process. Every day when that day’s coat was finished, I cleaned out the brush with turpentine and then put it in a soup can half full of turpentine to leave it sit overnight. It’s very important that the brush does not dry out!
OK, finally on to the sealer coats … this will be very very thin varnish, so BE CAREFUL or you’ll have varnish running everywhere! You want to keep any varnish runs at least just on the blue tape and not all over the gelcoat. I always carry a paper towel with me to immediately wipe up drips.
Between varnish coats, it’s time to “get the smooth on” as our friend Doug on sv Kristiana used to say. All the instructions I’ve read for varnish calls for “a light sanding” between coats. In the past, we’ve used 3M red pads for this, but this time we’re “graduating” to wet sanding.
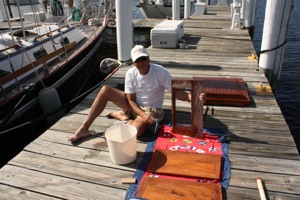
Wet sanding is one of the tricks to achieve the glassy finish that I’m looking for on the varnish. Now our days fall into a routine. David’s a much earlier riser than I am, so each morning before the dew on the wood has dried (but after his second cup of coffee, no need to get crazy about this!), he’s out on deck, wet sanding with 400 grit wet/dry sandpaper.
We learned an IMPORTANT trick for wet sanding — mostly the way we learn most stuff, by doing it the WRONG way first!
When you wet sand, you don’t make “dust” like when you regular sand. Oh no! Wet sand generates a paste that’s tenacious in sticking to your varnish like you wouldn’t believe — it’s almost like you super-glued the earlier coat of varnish. So now you have a white film over everything that once dry is NOT coming off!
SO, be sure to have your hose, or a bucket with some water and a wipe down rag with you as you go! Do NOT wet sand and area and go back to wipe it off a half hour later when you’re done with the entire project! It will take you longer to get the film off than it took to do the wet sanding!
I brush on the initial two sealer coats (24 hours apart) … the varnish is so thin that it appears to soak into the teak, which is what I want. At this stage, it doesn’t look “varnished”, but don’t fret, that’s for the build-up coats. I was so disappointed the first time I did this – I thought sure that the first sealer would start to yield the glassy shiny finish I was looking forward to, but it didn’t happen – don’t get discouraged!
FINALLY, Day 3 of actual varnishing, we get to put on the first “real” coat of varnish. Once again, Rodney (The Varnish Artist and my mentor on this project), instructs me to dilute the Pettit Flagship Varnish. This time we use an Interlux 333 product, which seems strange with a Pettit varnish, but se la vie. But there’s very little diluted and the varnish is still thick and brushes oh so beautifully! Remember, BRUSH ONE DIRECTION ONLY! If you brush back and forth, you’re erasing the mirror glassy effect that you’re trying to hard to achieve!
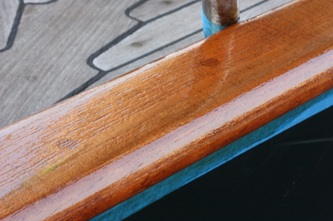
It doesn’t take long to finish one coat and stand back and observe the progress on the project! It’s still not the glassy finish I’m looking for, but at LAST it shows evidence that there might be hope!
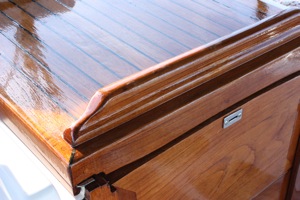
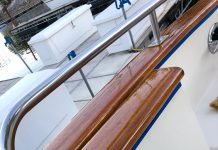
7 days later and we stand on the dock surveying our new teak. The glassy finish is wonderful and exactly what I wanted. The project might not be perfect – in fact, upon close inspection, I can see lots of imperfections, but it’s my first try and I am very excited about the result! Amateur hour turned out to be OK and saved lots of money that we’ve already spent on other things like replacing our refrigeration condenser! 🙂
It’ll need another couple coats in a few months, but that’s no different than when we had Cetol, and I still think varnish is prettier, even with lots of Cetol Gloss coats! Buena Suerte! Do you have any tips to make it better? Leave a comment! THX! J






Thanks for taking the time to post this! I’m beginning the same process on my Baba 35 and appreciate the advice.
[…] Teak Week – Day 5: Finally The Varnish! […]