It’s Teak Week! This week we’ll do a series of posts that details more information about redoing the teak on Winterlude, our 1985 Passport 37 sailboat. For a quick teak project such as redoing our cockpit table, see the post Varnish Step-By-Step: Cockpit Table.
The subject today is Stripping Teak, then Replacing Bungs and Caulk, third in the series is Brightening Teak and finally Varnishing Teak. Be sure to stay tuned! The ironic thing about this week’s series is that before we bought Winterlude, we had a spreadsheet of specific things we required in a boat – one of the TOP items was NO TEAK! But then we fell in love with our current Passport 37 and the rest is history.
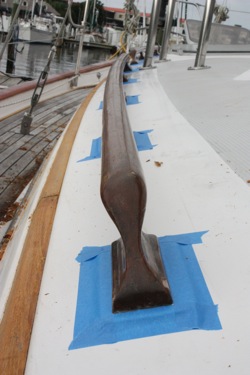
In 10 years now, the teak on this boat has been stripped to bare wood and completely redone 3 times. That’s an average of just over every three years. The first two times, we had someone else redo it – once here in Florida and once in the Rio Dulce, Guatemala. Since it’s very labor intensive and costly, we would prefer it last longer than it is! The boat had Cetol Light and Gloss on it when we bought it. We were brainwashed by the advertising and foolishly felt Cetol would be less maintenance and cost than varnish, even though we liked varnish better. So $2,500 later, the boat was stripped and re-Cetolled, plus several coats of Cetol Gloss. We were instructed to add a couple coats of Cetol Gloss a year and the newly redone teak should last for years and years. We dutifully added 2 coats pretty much every six months, but after 3 years, the black mold under the finish was back and worse than ever. So we had it stripped and completely redone again in the Rio Dulce Guatemala. This time the entire project cost us about half due to less expensive labor costs. And we foolishly had it redone in Cetol yet again – I guess we hadn’t caught on to the pattern yet. Again, we added 2 coats every six months or so. Keep in mind, we repaired nicks and chips along the way, so it wasn’t that we had bare spots all over the place allowing moisture to intrude (which is what causes the black mold and mildew to grow under the finish).
A while back, David & I decided that since we seem to have temporarily misplaced our $25 million, we can’t afford to pay to have a pro redo our teak this time. We’d also decided to test redoing the caprail in varnish – see how much trouble it really is and how long it will last versus Cetol.
The teak was in bad shape and getting worse, which is very sad because the teak on this boat is gorgeous – that would be the raw wood, not our caretaking! After first trying my varnishing “talent” on the inside of the hatches and bug screens, I ignored David’s encouragement not to strip and sand the cap rail … I did a test section so that if it looks too bad, I could always strip it and go back to Cetol. But surprise surprise, it looked pretty good! Hopefully when I apply some varnish, it’ll look even better! 🙂 I decide to tackle the caprail as a test project to see if I could redo my own teak and make it look acceptable. We were lucky to have a friend who’s company is “Varnish Artist” serve as my mentor along the way – he was too busy to do our teak even if we’d wanted to pay for it to be done again. With the other re-fit projects taking priority – the new cockpit enclosure, new fridge compressor, etc, we didn’t have any extra money for something as frivolous as teak.

After first trying my varnishing “talent” on the inside of the hatches and bug screens, I ignored David’s encouragement not to strip and sand the cap rail … I’m doing a test section so that if it looks too bad, I can always strip it and go back to Cetol. But it’s looking good so far! Hopefully when I apply some varnish, it’ll look even better! 🙂
Back to the refit grind! Our pro varnish friend told us if he redid all our teak, it could be several thousand dollars. So as I struggled to remove the cetol today, I kept a mantra … thousands of dollars of fun, thousands of dollars of fun… Maybe it wouldn’t really cost that much, but the theory is motivating!

I borrowed a pro Porter Cable sander, but the cetol on our caprail is way too thick. Our choices were chemical stripper or the good old heat gun and a scraper/stripper tool. So heat up the heat gun! I spent 5 hours and David spent 2 hours heat stripping the teak on Winterlude’s cap rail. The project is slightly less than half done. And I’m not sure I can MOVE! Crouched into a tight ball most of the day thanks to Winterlude’s narrow side decks (and our own laziness by not stripping the boat of all the “stuff” in the way), I managed to burn my leg twice on the heat gun and only strip about half of what I had hoped. But I’ll never again think anyone stripping teak is paid too much! My hands ache, my elbow aches, my back aches … and I’ll get up tomorrow and do it all over again! 🙂
But as with the small test section I did, after it’s done, it will make Winterlude look 10 years younger and make me feel SO good of the accomplishment. So … I WILL get up tomorrow and do it all over again! Thousands of dollars worth of fun, an inch at a time….
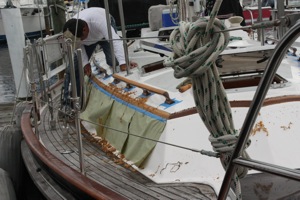
For the followup project with the handrails, eyebrow and companionway, we decided just to strip with a teak scraper tool. The cetol was so thick that it peeled off relatively easily. We also invested in paying our friend Rodney, the Varnish Artist, who happened to have two days between projects in his own business to help us. He said in two days we could have all the prep work done, including stripping, brightening, sanding and taping ready for varnish. This seemed a bit ambitious to me, but he’s the pro!
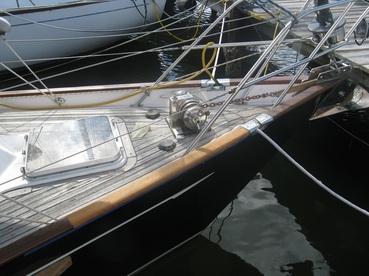
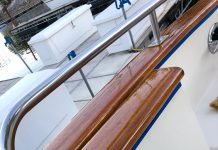



[…] we started with 8 coats and we’ve added 2 coats every six months …. on the other hand keeping the Cetol from breaking down required the same amount of effort and since it wasn’t as pretty, it was easier to […]
Sell your boat now while you still love her. If you keep her, the maintenance will turn your love to hate, the maintenance will slack off resulting in her loveliness diminishing as well as her market value. There are plenty of good sailboats on the market with NO exterior teak. The beauty of a boat lies in her lines, the quality of construction, the fit & finish and her ability to be sailed without leaving the cockpit…the way she’s rigged. No need to guild the lily.