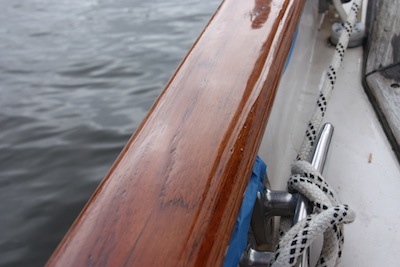
“But your teak looks gorgeous, why are you sanding?” But that’s the point! The key to having glossy varnish on teak is to keep it looking gorgeous, not wait until it looks like it needs some attention. But every time we start blue taping, that’s the reaction we get. Yes, it takes some time and effort, but I love every time I look at it and know WE did it, WE made it shine like that! 🙂
Years ago, I got fed up with having to add coats of Cetol to Winterlude’s teak as often as some friends were adding coats of varnish. And although I liked the way the cetol looked with cetol gloss added, there’s just nothing like varnish. So we stripped the cetol to bare wood and started over with varnish. We started with 8 coats, not counting the two “primer” coats — I was dismayed to learn that the first two coats don’t count. After six months, we figured a few months in the Bahamas probably burned off at least one, maybe two coats, and we added two more coats. Basically, we’re just maintaining the 8 coats all the time when we lose one or two and add two.
So now it’s two years later. We added 2 coats last summer (June 2012) and another two coats in January 2013. Step by step, here’s what we did:
1. Blue tape everything. We have blue tape on anything that I could possible get varnish on when it gets to that step. Stainless, the hull, inside & out, anything. It just makes the clean up easier if we do this part right.
Yes, taping around all the handrail bases is a real PITA! But worthwhile later.
2. Wet Sand. This is the part I don’t enjoy. But it’s the prep that makes the ultimate difference in how the varnish looks after it’s done and how well it lasts. So as we wet-sand, we keep telling ourselves that for the next six months everytime we look at the reflection in the varnish we’ll be glad we did it right.
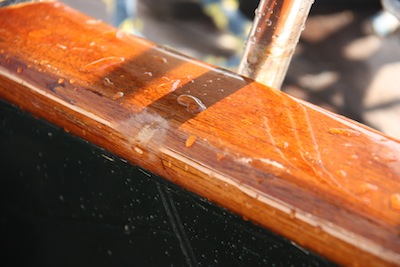
We used 400 grit wet/dry sandpaper for the wetsanding. Even with a bit of pressure, it doesn’t really feel like it’s doing much. It will create the white paste-like goo that you see on the teak. If you don’t wipe it down before it dries that white paste-like glue turns into superglue and is almost impossible to remove. So this time, we changed our technique for wet sanding and carried the hose with us to rinse as we went. That way, we get the white goo off while it’s still wet and it’s not as much of a problem when we’re wiping down and tacky clothing to get all the little dust particles off for varnishing. After I do what you see here, I’ll rinse with the hose, then take a damp rag & wipe it down, rinse again – then rinse the rag and do another wipedown before moving on. It really doesn’t take as much time as it sounds and it saves SO much time later.
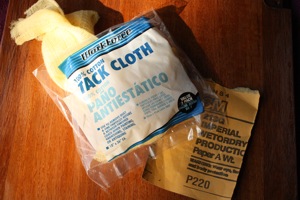
3. After the teak is dry and all the sanding goo is off, we use tack cloth to get the final residual dust off. Note the sandpaper here is 220 grit, this photo was from when we were originally doing the teak and going up through the grits of sandpaper from rough to extra-fine. We used 400 on the maintenance coats.
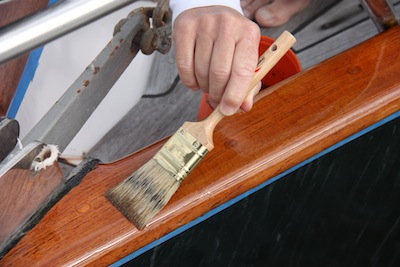
4. Finally it’s time for the fun part. The varnish. Too much on your brush and the varnish will drip. Too little and you won’t get enough on to make it last. It takes a while each time I do this, but I get the “feel” and then know how much to use.
A critical part of varnish is to only brush in one direction! NEVER ever brush the varnish on with a back & forth stroke like you would in painting.
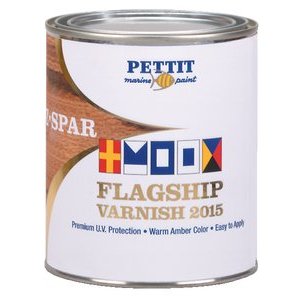 We use Pettit Flagship Varnish – not inexpensive, but after all the required prep work, blue taping, wet sanding (i.e. hard manual labor!), it seems silly to skimp on the actual varnish.
We’ve also been known to thin the varnish just a tiny bit with Interlux 333 Brushing Thinner. It seems to make the varnish flow a bit easier and maybe it’s all in my head, but I don’t think I get as many brush strokes. If you choose to do this, be careful, just a splash is enough depending on how large of container you’re using to varnish from.
And of course, use only a good badger hair brush – otherwise, before you’re halfway down one side you’ll be losing bristles and there’s nothing more frustrating than trying to pick escaped bristles out of newly brushed varnish. Ask me how I know! After I’m done with the first coat, I clean the brush with turpentine and leave enough in a metal soup can (or any small can) to cover the brush until the next day. After we’re done with the project, I toss the brush if I’ve used it for two complete coats. It will do more, but it’s easier to start with a new brush next time. For small touchups such as you’ll see below, I often just keep some small cheapo foam brushes aboard and toss them after I use them.
If you look very closely by the teak plug behind the brush, you can see where I’ve brushed new varnish on over the wetsanded previous coats. Don’t forget, brush one way only!
5. Let it dry overnight and repeat the next morning …. rinse it off, wetsand with 400 grit making sure you don’t let the wetsand paste dry on the wood, wipe it down good, after it’s completely dry use tack cloth to remove any residual dust, then add a 2nd coat of varnish.
6. Let the 2nd coat dry overnight and then peel off all the blue tape and clean up any extraneous drips that you missed and untie those dock lines & GO SOMEWHERE!
We spent a week anchored out at a favorite local anchorage and David managed to drop the chain snubber on the teak leaving a ding. Any break in the teak will allow mold to creep under and begin the insidious process of undermining all your hard work. So when we returned to the dock, we wetsanded the ding and I put two more coats of varnish just over the bare spot.
Yes, it’s a bit of work. No it’s not more work than all those years we used cetol and I think it’s much more attractive. Your results may vary. 🙂 Any comments on your experiences using varnish? What brands do you like? Have you ever tried coating it with 303 Aerosol Protectant to add to the UV shield? I may try this, but I’m a bit worried the 303 might dissolve or make the varnish cloudy. Please leave a comment and share! CHEERS! Jan





[…] Keeping Teak Pristine […]
[…] Keeping Teak Pristine […]