If you have teak on your boat, sooner or later you’ll have to replace the black caulk between the seams. We’ve been somewhat successfully avoiding this project for years on our 1985 Passport 37. From time to time we patch places where the black caulk has literally rotted away … or is bubbling up or otherwise not in place doing its appointed job.
Being teak novices when we bought the boat, we swore we weren’t going to do anything to the teak decks until they started leaking — maybe not a wise strategy, but so far it’s worked. But after six years in the deep tropics/Western Caribbean, the teak caulk is severely deteriorating. The decks still don’t leak, but we decided it was time to take action.
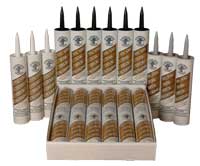 Enter Teakdecking Systems who we just happened to run into at a boat show booth. And they happen to be located in Sarasota, Florida, just north of where we are currently. In addition to installing absolutely jaw dropping teak decks on multi-gazillion dollar yachts, they’re also very helpful to those of us with old boats trying to keep our teak together! Click and go look at their website if you just want to gaze at beautiful teak, but don’t get hung up there. Call them if you need something, explain what you need & they’ll tell you how to fix it or what to do next. Very very helpful! Plus even though the website says you can only buy a case of caulk at a time, they’ll sell you a tube or two. Highly recommended!
Please note that we are not in any way affiliated with Teakdecking Systems other than satisfied customers for just the small maintenance stuff. Now on to the fun stuff (yeah right….) ….
Step 1: Clean all the caulk out of the section you want to replace. We use a special tool that we got from Teakdecking Systems – it’s amazing how much easier and quicker a yucky job goes when you have the right tools! You can get both the tools we use from Teakdecking Systems. They’re not cheap, but they make it much easier!
Now you’re left with a section totally devoid of old caulk (notice that ALL our caulk is deteriorating, but we have so much teak that we’re not sure we’re up to replacing it all quite yet … as I said earlier, it’s not leaking, so we’re procrastinating and just spot fixing so far….). 
Step 2: Sand the sides of the now empty section to insure you got ALL the old caulk out – new caulk will not stick to old caulk, so if you’re not really careful during the preparatory steps, you’ll end up having to redo it all over again. 🙁 This tool is also from Teakdecking Systems.
The step I didn’t get a photo of was after this step when we used the ShopVac and vacuumed up all the dust and residue out of the spots.
Step 3: Now clean it with acetone to clean out anything the ShopVac missed.
Step 4: Now put in the Bondbreaker Tape. We’re never quite sure why we’re doing this, although the instructions say that the tape allows the caulk to expand and contract without breaking … so we try to comply with the instructions…
OK, so this step is probably the hardest and we’re not very good at it…
If you look closely you can see that our bondbreaker tape doesn’t exactly butt up to the edges of each spot, but hopefully the best we could do will be good enough.
Step 5: Then we blue tape each spot to try and avoid getting messy gooey oozy black caulk everywhere.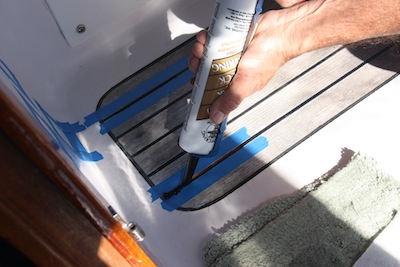
Step 6: Oh boy, now comes the fun stuff! We’re using TDS SIS-440, the black caulk from Teakdecking Systems. At this point, I usually hear a string of expletives. It’s hard to get into a “rhythm” when you first open the caulk and it seemingly wants to go everywhere. But no worries, that’s what the blue tape is for. The first couple of spots don’t always look as even as the later ones, but that’s just the way it is.
Step 7: Now use a putty knife and smooth it out.
Step 8: MOST IMPORTANT STEP!!! DO NOT STEP IN THE GOOEY BLACK CAULK! You’ll make a huge mess and your partner might never forgive you. Ask me how I know! The problem with patching is that we’re patching spots where we have to walk for the next day to get on and off the boat. 🙁
Step 9: Let it dry overnight and remove the blue tape. It’ll take 48 hours to completely cure. After that, if you want, you can sand it using an 80 grit sandpaper if they’re not exactly level with the old caulk. Voila! Not perfect, but better than a rotten hole in the caulk!
Provided you haven’t stepped in the goo and made a bigger mess, no problem… you’re done! Congratulations! Anyone with more experience want to chime in with tips to make this easier? Please leave a comment! THANKS! Jan
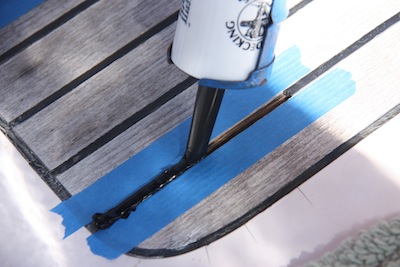


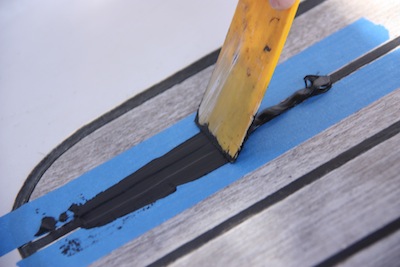



Murphy’s Law # 598: Anything you want to protect and forget…You will get caulking on it and it will not come off!! (ask me how I know)… Conversely: Anything you want the caulking to stick too, you must do all of the steps 100% or better or it will leak or flap or just wont stick… Part II: Don’t worry that the area you didn’t prep at all now has caulking on it that just won’t come off, that’s just how it goes…
Truer words, never spoken! 🙂 Cheers Jeff! Jan
It’s great to know that you should use the sandpaper to get rid of all the excess caulking. My spouse and I are thinking about getting our caulking redone this year so that it looks much better. We need to use some solutions that will preserve the caulking for a much longer time.